Search documentation
Find a documentation page by the words on it.
Documentation
Invoices
An invoice bills a patient for a visit's charges. Issuing one gives it a number, a total and a due date, and locks its charges so they cannot be changed by accident.
This feature is controlled by the Billing feature flag. If you do not see it in your clinic, contact Serelora at support@serelora.com and ask for it to be turned on.
Step 1: Check the charges
Open the visit's charges as described in Adding Charges from a Visit. Make sure every service is listed and priced the way you want. Charges are editable until the invoice is issued.
You do not have to finish the visit first. You can invoice any visit that was not cancelled or entered in error. When the visit is over, an Admin or a Physician can select Mark visit finished. A visit cannot finish while a note filed under it is an unsigned draft. See Finishing a Visit.
Step 2: Issue the invoice
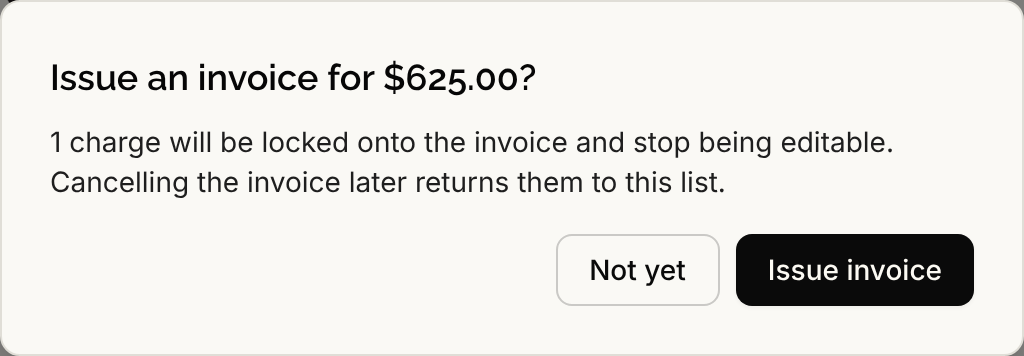
Select Generate invoice under the charges table. A confirmation asks "Issue an invoice for" the total, and says the charges "will be locked onto the invoice and stop being editable." Select Issue invoice, or Not yet to go back. A message says "Invoice issued".
The invoice appears under Invoices at the bottom of the visit, with its number and the status Issued. Only charges that are not on another invoice are included. If there are none, Serelora says "This visit has no billable charges left to invoice."
Step 3: Read the invoice card
Each invoice card shows the total, any adjustments, the balance, and a line such as "Due" and a date. If the invoice is late, the line reads "Past due" with the number of days. The status changes to Paid when the balance reaches zero. A warning that reads Needs review appears when an invoice was overpaid.
Select Download PDF to get an itemized copy, see Downloading an Invoice PDF. From the card you can also record a payment, email a payment link or adjust the balance.
Step 4: Cancel an invoice if you must
Select Cancel invoice on an issued invoice. The dialog explains that its charges return to the un-invoiced list and stay editable, that any emailed payment link stops working, and that a corrected invoice gets a new number. Select Cancel invoice to confirm, or Keep invoice to leave it.
You cannot cancel an invoice that has payments applied or live adjustments. Move the payment back to unapplied or reverse the adjustment first. See Invoice Cannot Be Changed.
Payment terms and due dates
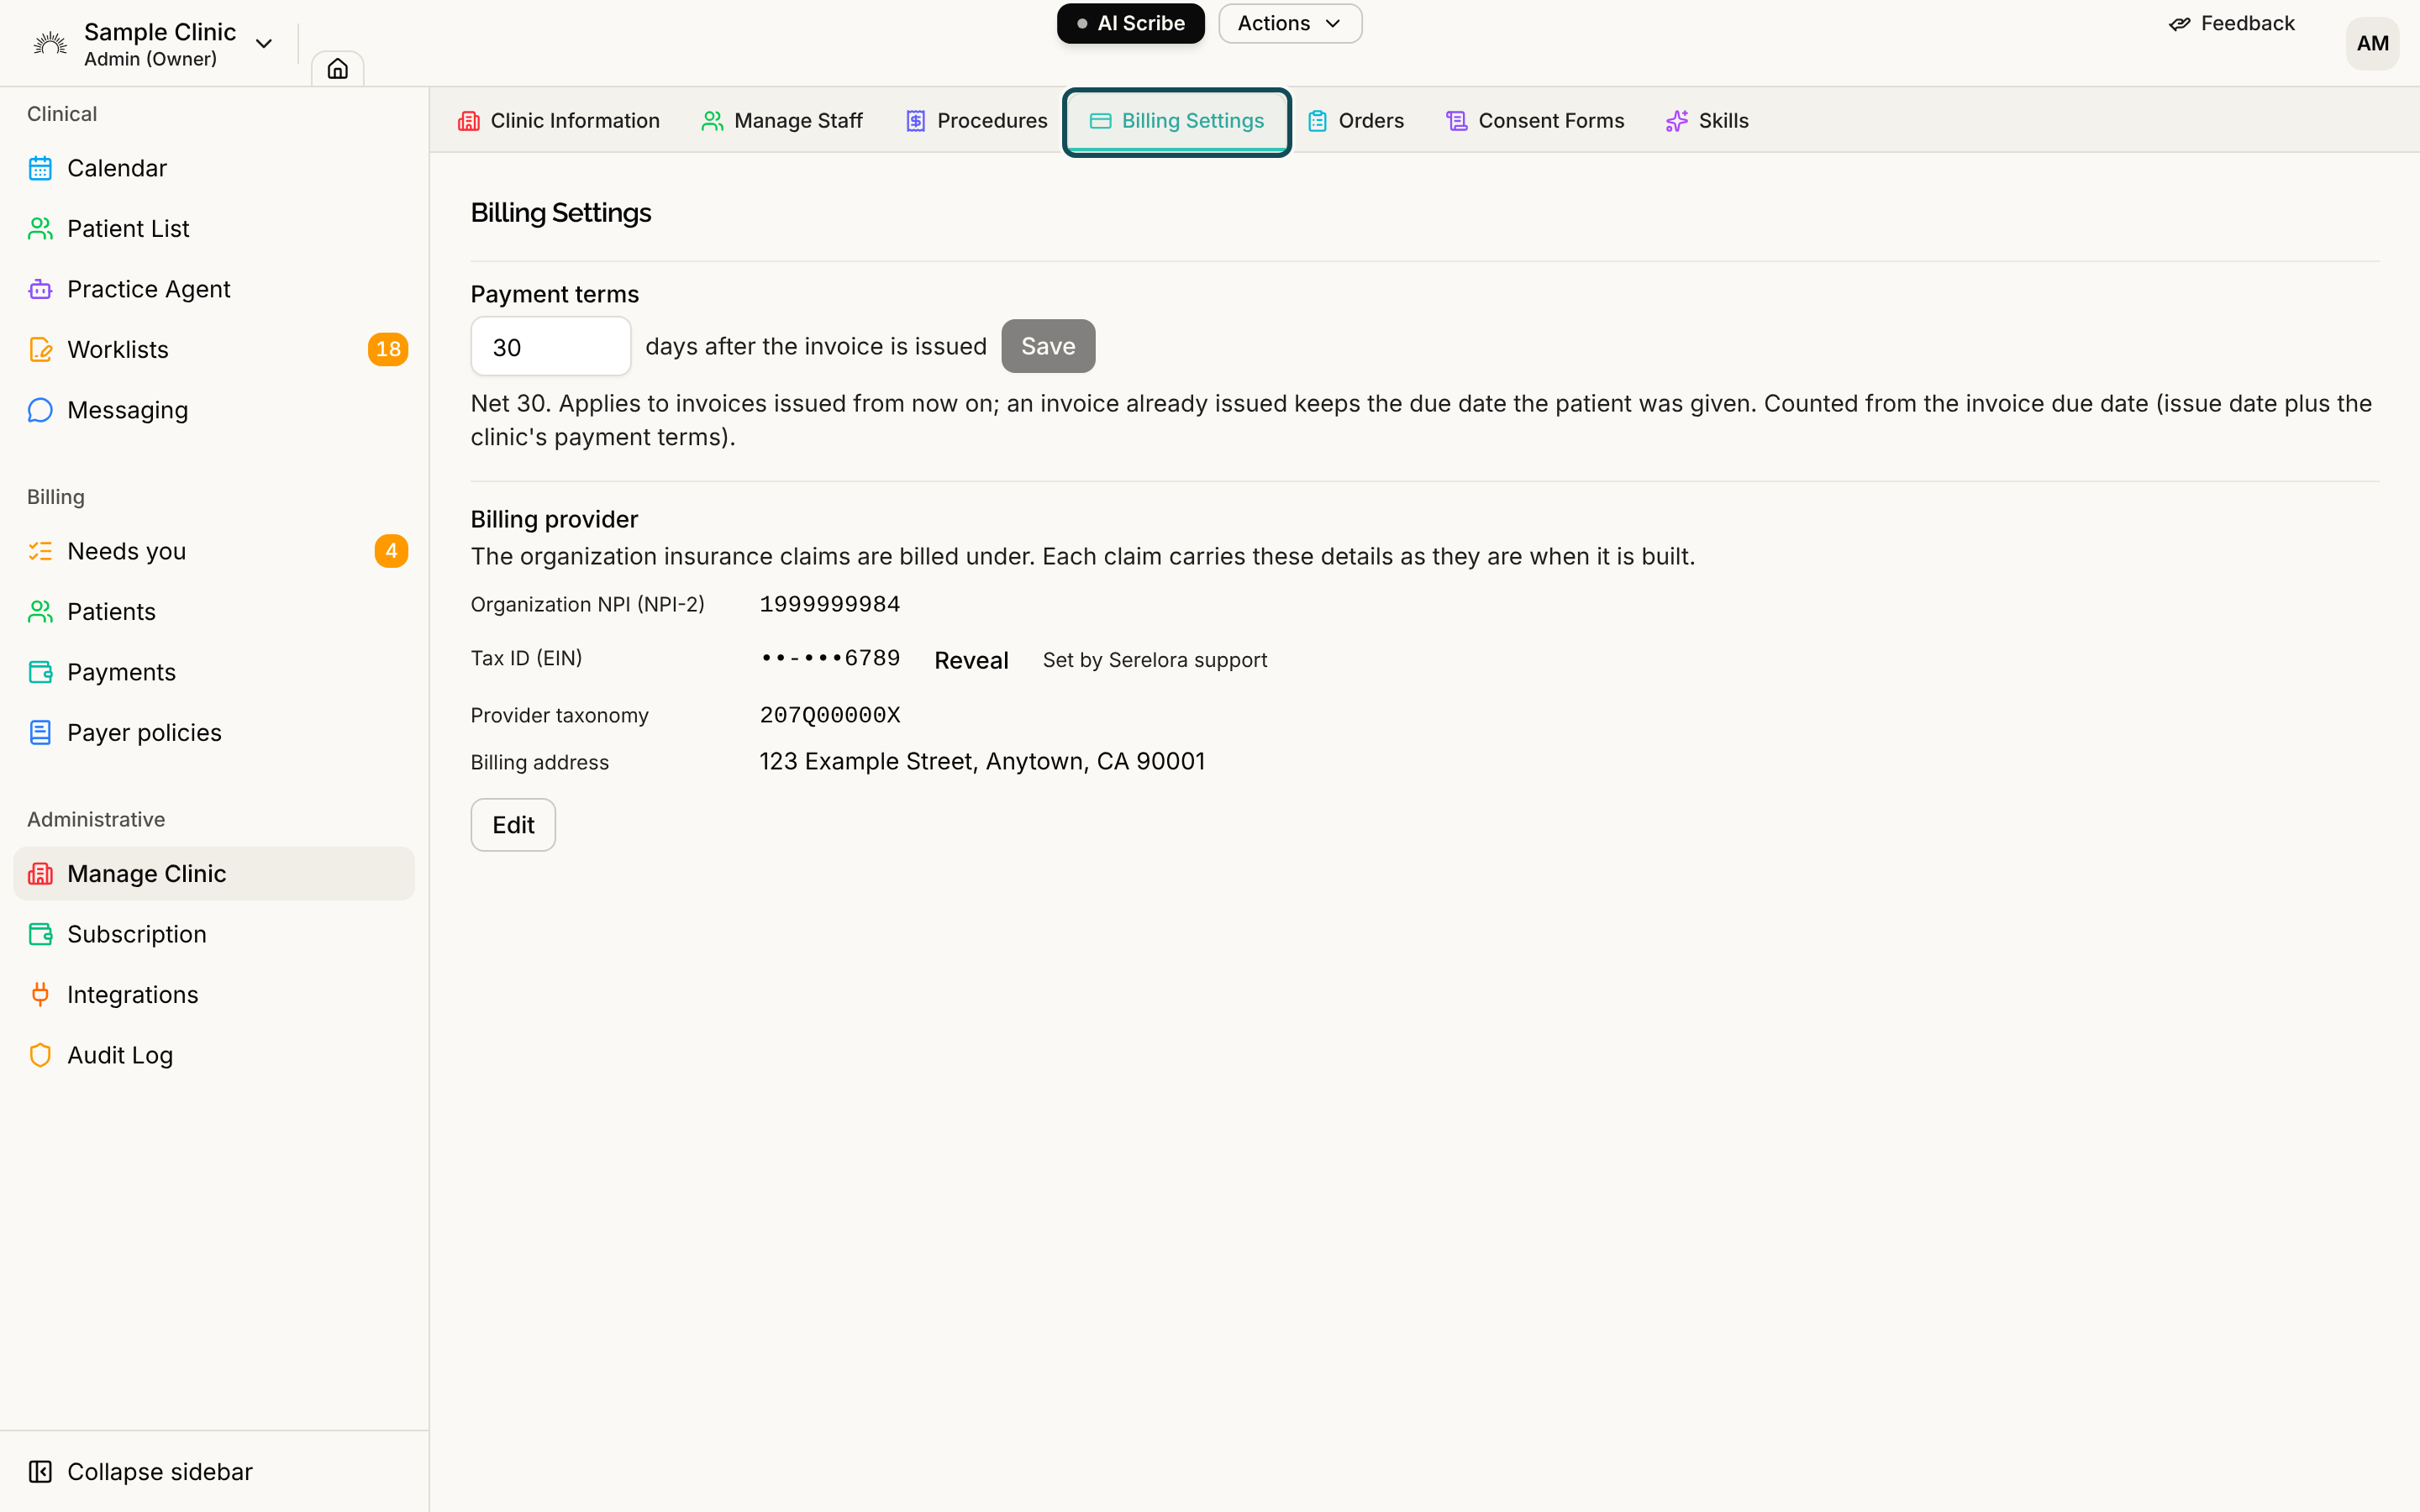
Every new invoice gets a due date from your clinic's payment terms. Open Manage Clinic, then the Billing Settings tab, and change Payment terms to a whole number of days from 0 to 365. Select Save. A value of 0 reads "Due on receipt". The change applies to invoices issued from now on, and an invoice that was already issued keeps the due date the patient was given.
Who can do this
Issuing and cancelling invoices and changing payment terms need the permission to issue invoices. By default that is Admins and Office Managers. Anyone who can read billing can see an invoice and download its PDF.