Search documentation
Find a documentation page by the words on it.
Documentation
History and Problems
The History & Problems tab holds the longer-term story of the patient in five collapsible sections. Each section is a table of entries, and each entry opens to its full detail when you select it.
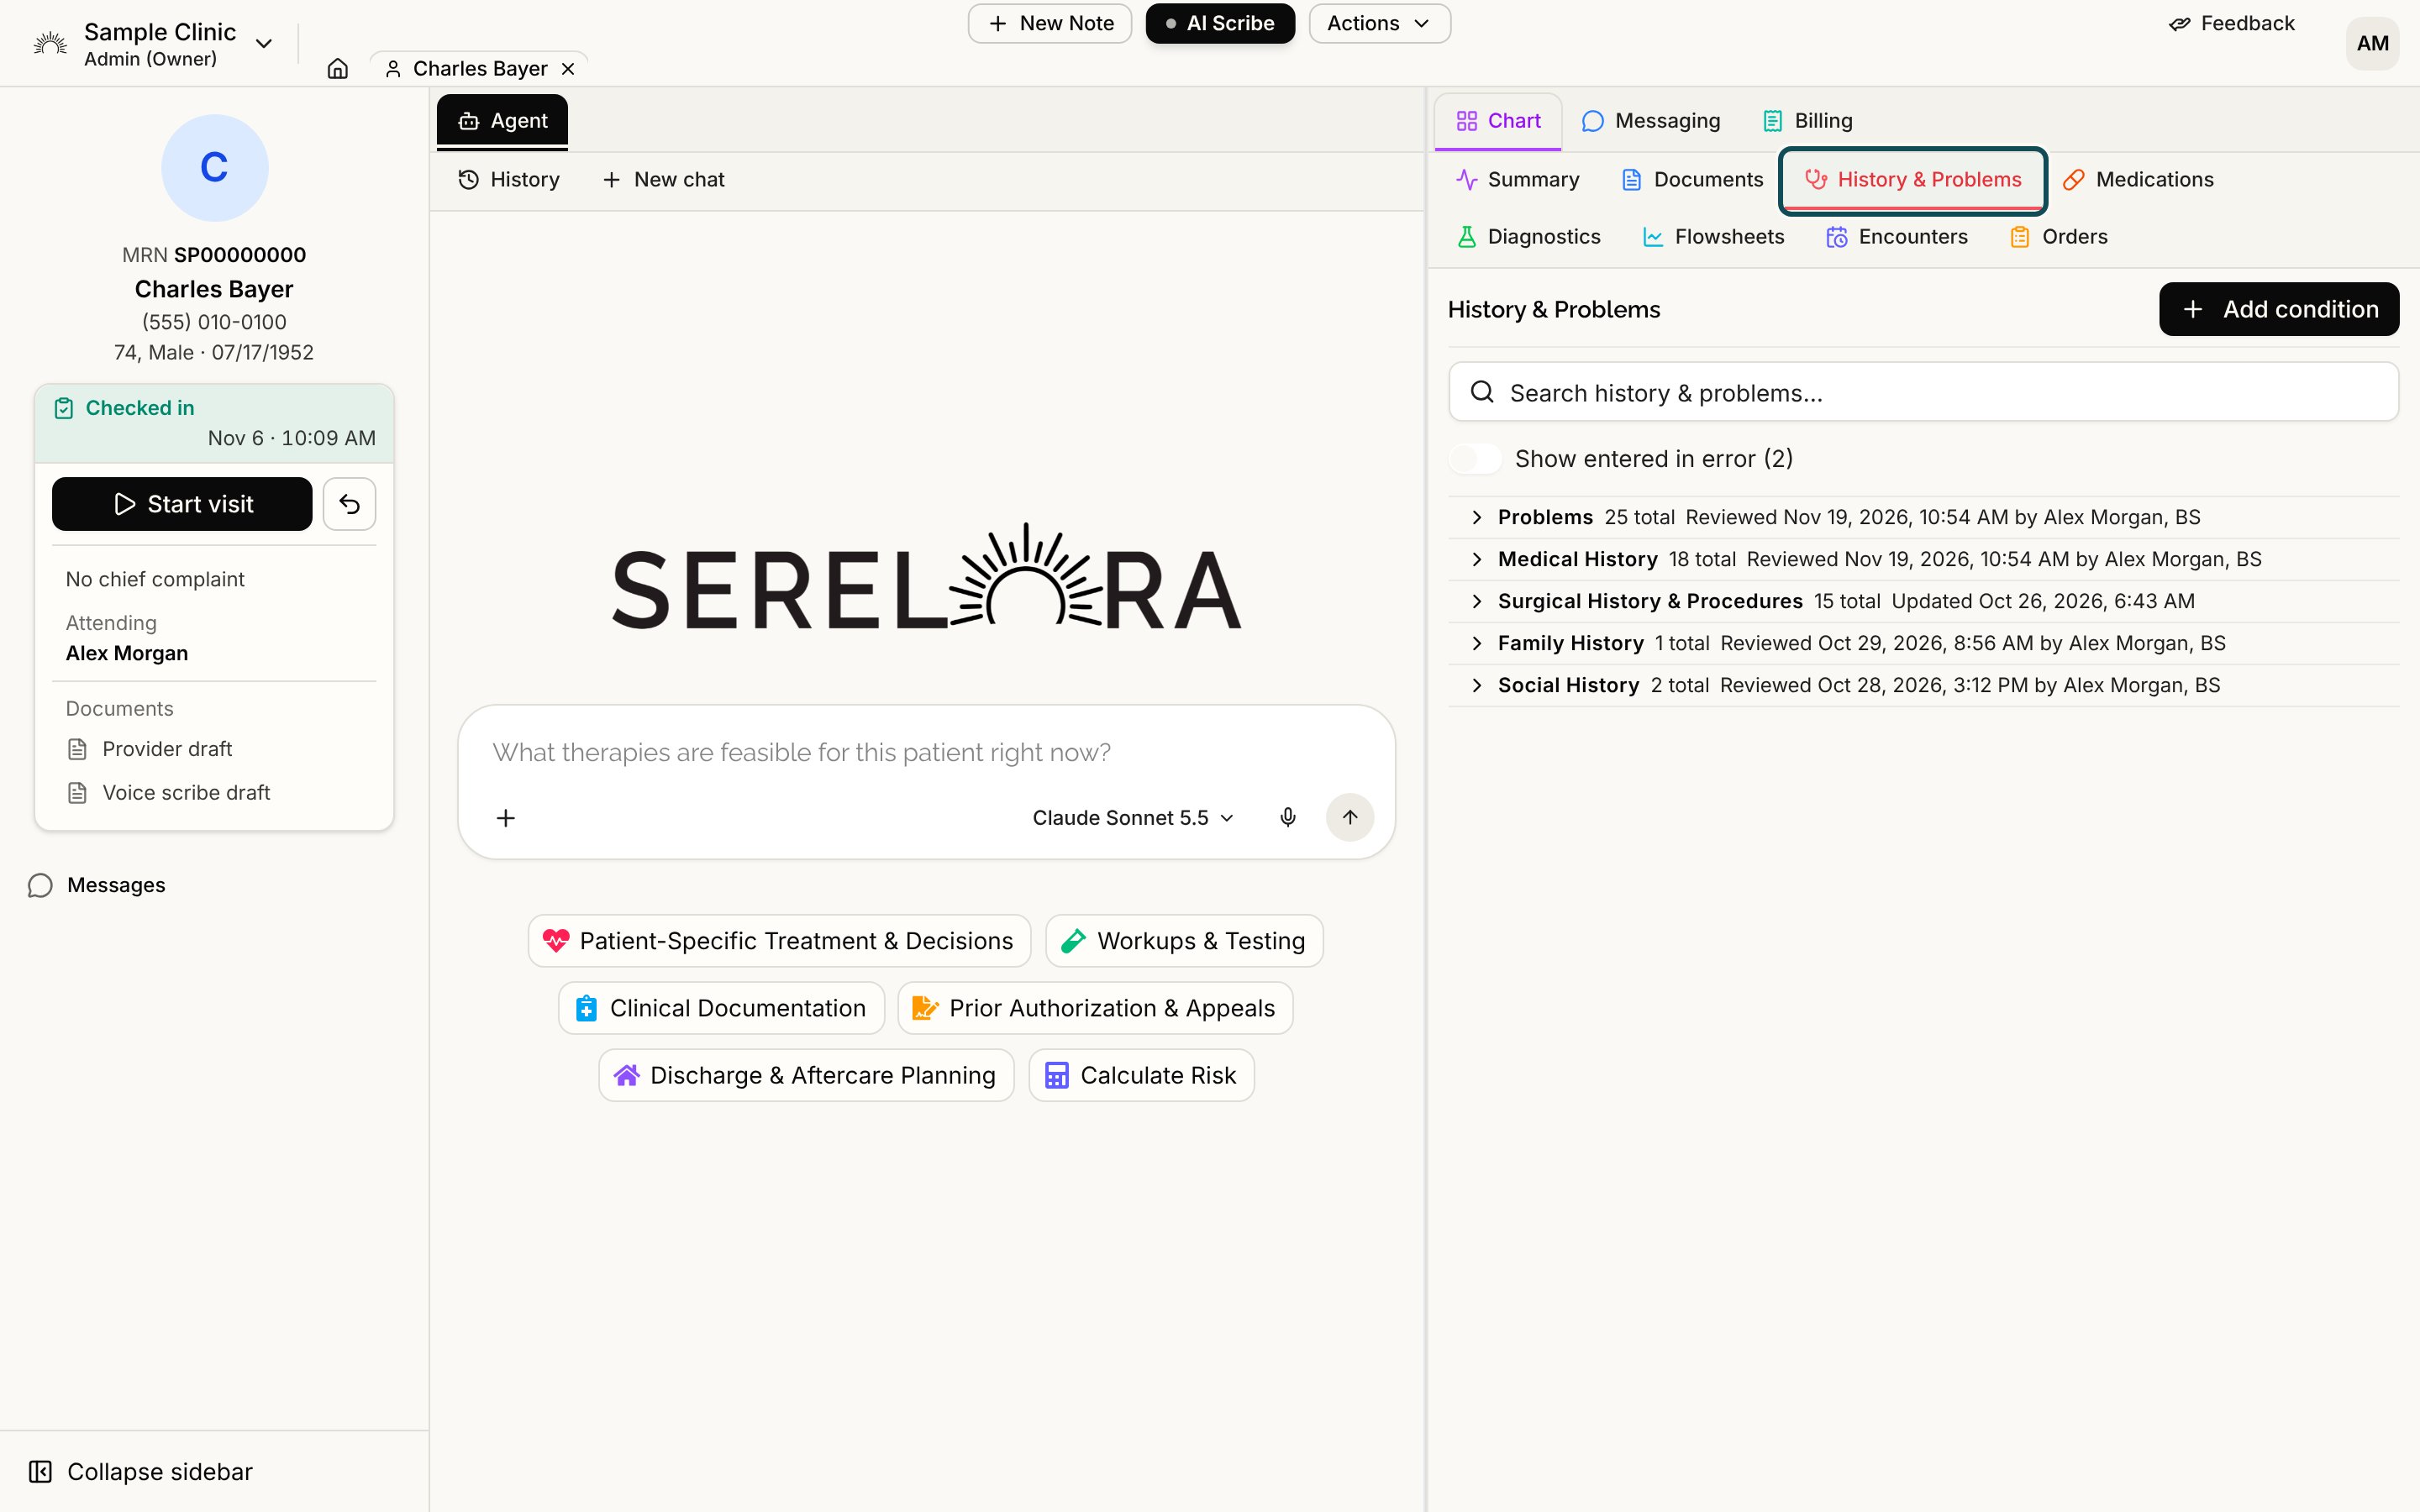
The five sections
- Problems lists conditions that are currently active.
- Medical History lists conditions that are no longer active, such as resolved or inactive ones.
- Surgical History & Procedures lists procedures.
- Family History lists conditions in relatives. See Family History.
- Social History lists social and lifestyle answers, one per topic.
A condition lands in Problems or Medical History because of its clinical status. If no source has stated a status, Serelora presumes it is active, so it appears under Problems rather than being hidden. An entry nobody has confirmed shows an Unconfirmed badge, so a presumed status never looks confirmed. See Correcting a Claim.
Each section header shows how many entries it holds, such as 3 total, and an Updated or Reviewed line. See Last Reviewed.
Step 1: Open a section
Select a section's header to expand or collapse it. Typing in the Search history & problems… box opens the sections that have matches and closes the ones that do not. Clearing the box puts the sections back the way you had them.
If you can edit the chart, opening a section also records that you reviewed it. There is no separate button on this tab.
Step 2: Read the table
The Problems and Medical History tables have these columns: Condition, Status, Onset Date and Last Confirmed. The Status cell holds two pills side by side. The first is the clinical status, such as Active or Resolved. The second is the verification status, such as Unconfirmed or Confirmed. Both are explained in the Glossary.
Entries are ordered so that active, confirmed ones come first. An entry that someone ruled out (refuted) is struck through and sorts to the bottom. Click a column heading to sort by it instead.
Select any row to open its claim detail. See Claim Detail and Where a Fact Came From.
Step 3: Show entries marked in error
An entry that was marked entered in error is hidden by default. When there are any, a switch labeled Show entered in error with a count appears above the sections. Turn it on to see them struck through. Their row menu then offers Undo.
Step 4: Add or correct entries
Use Add condition at the top right to record a new condition. See Adding a Condition or Medication. To change a status, a date or the name of an existing entry, see Correcting a Claim.
Add condition and the row menus are shown only to roles that can edit the chart: Admin, Physician, Physician Assistant and Medical Assistant by default. Everyone else can read the tab.
See also
- Surgical History and Procedures explains each column and the surgical or non-surgical setting.
- Social History explains the Axis, Answer and Date columns.
- Where Each Kind of Entry Appears lists which tab shows each kind of entry.