Search documentation
Find a documentation page by the words on it.
Documentation
Reviewing and Acting on Lab Results
Lab results reach a Serelora chart as documents and records, and the chart shows them in one grid. This page follows a result from arrival to action: read it, check the source, decide with the agent if you want help, tell the patient and order what comes next.
What you need
- Permission to read charts to review results. A secure message needs permission to send secure messages, which Admin, Physician and Physician Assistant have by default, and your clinic's Secure messaging switch on. A text also needs your clinic's text channel on. Placing orders needs the Orders feature and an Admin or Physician role.
- The results in the chart. Upload the lab report, import a health record file, or pull outside records. Reading narrative text and scans into the chart needs document extraction turned on for your clinic.
Step 1: Get the result into the chart
Select Actions, then Upload, and add the lab report. See Documents. If your clinic uses HIE Pull, outside results can arrive that way. See HIE Pull.
Step 2: Read the Labs grid
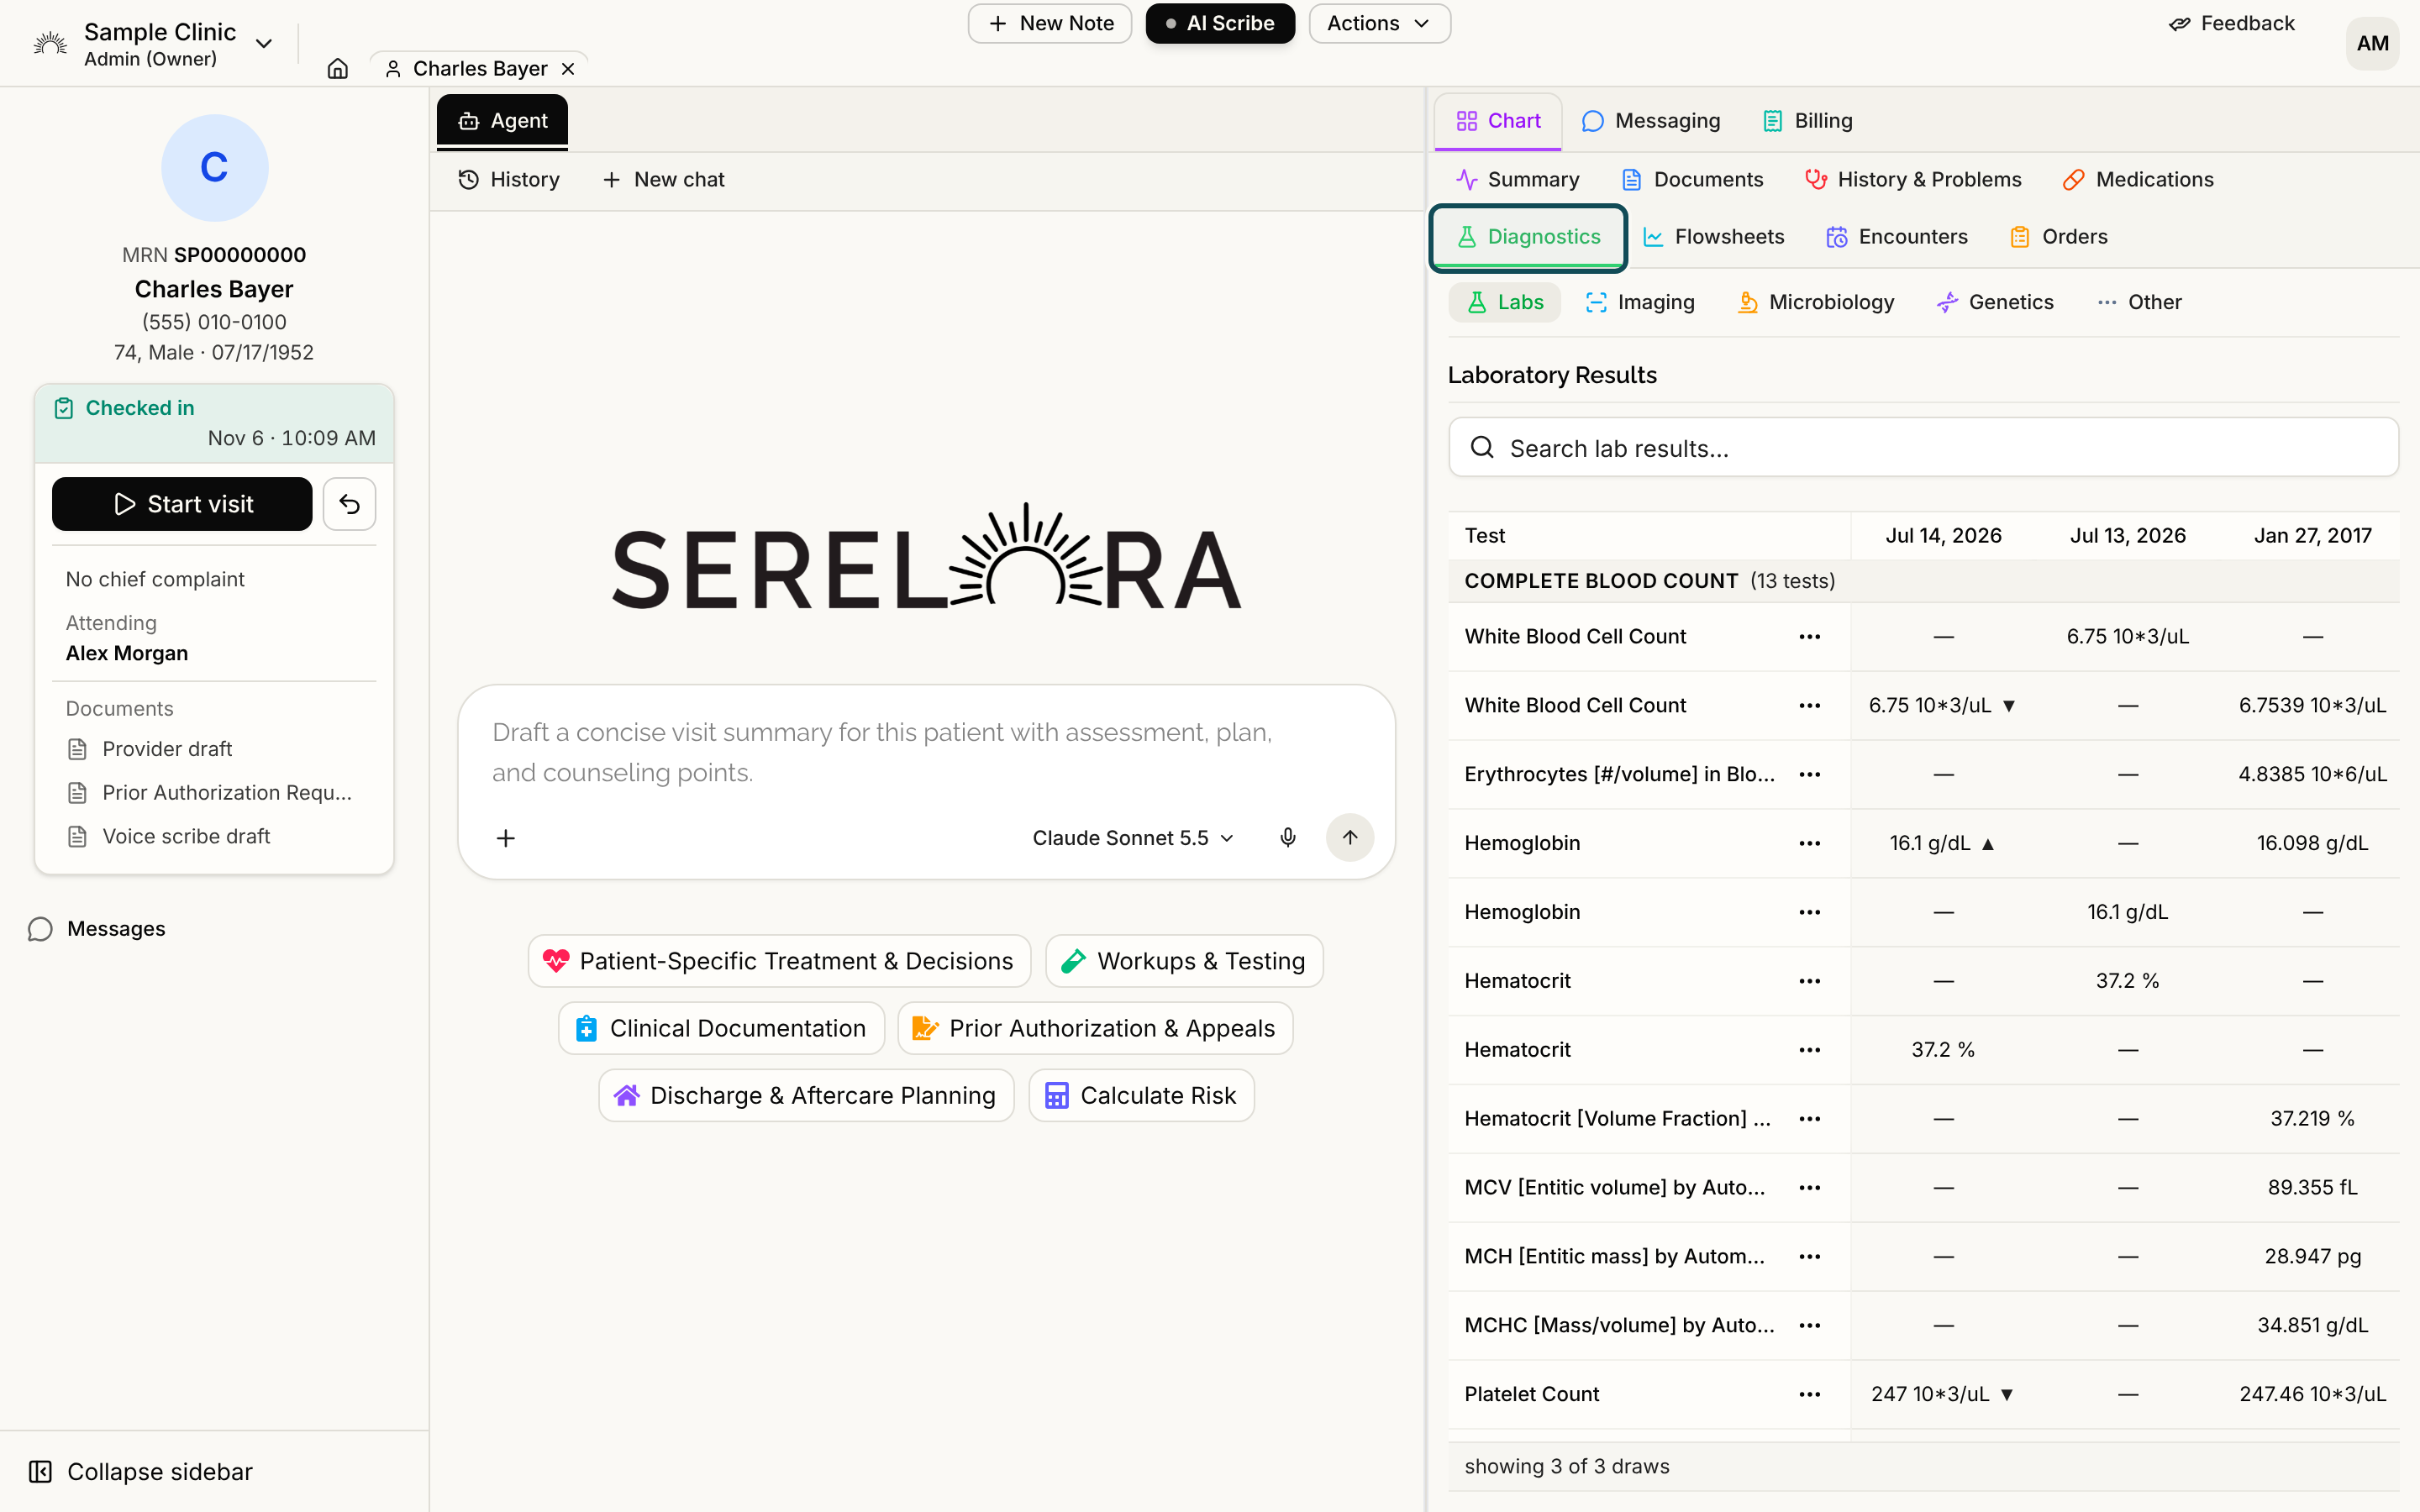
Open the Diagnostics tab, then Labs. Each row is a test, grouped under its panel, and each column is a draw date, newest first. Use Search lab results… to find a test and Load older for earlier draws. When a result and the one before it are both numbers in the same unit, the newer cell shows an arrow for the direction of change. See Labs and Diagnostics.
Step 3: Check where a value came from
Select a result to open its claim detail, with the document and the passage it was read from. Correct a wrong value or date from the row menu. See Claim Detail and Where a Fact Came From and Correcting a Claim.
Step 4: Ask the agent if you want a second look
In the Agent tab, the Workups & Testing chip has these prompts:
Which labs are needed given this patient's recent results?
What is the minimal next diagnostic step to reduce uncertainty?
Treat the answer as a prompt to check the cited entries and the evidence, not as a decision. See Clinical Decision Support and Guideline Lookups.
Step 5: Tell the patient
Ask the agent to prepare the message, then read it and select Send:
Text her that her results are ready.
A text carries a short notice only, up to 320 characters, so keep the result itself out of it. For the result, use a secure message, which can link the lab report from the chart. See Messaging a Patient from Chat and Attaching Files and Reports to Messages.
Step 6: Order what comes next and document it
If follow-up testing is needed, see Ordering Labs and Imaging. Record your review and plan in a note or, on a signed note, an addendum. See Writing a Note and Addenda.
What Serelora does not do
- It does not receive results from a lab for you. There is no results inbox to work through, and a result is not matched to the order that asked for it. Results appear when you add the document or import the record.
- It does not flag a result as high, low or abnormal. The grid shows the value, the unit and a direction arrow, with no color. Read the lab's own reference range on the source document.
- It has no results-reviewed sign-off. Labs cannot be marked reviewed the way medications can, so document your review yourself.
- The agent does not message the patient on its own. A message goes only when you approve it.