Search documentation
Find a documentation page by the words on it.
Documentation
Checking a Patient In
Checking a patient in starts their visit. It creates the visit record and changes the appointment to Checked in in one step, so the Calendar, the Patient List and the chart all agree the patient has arrived.
This feature is controlled by the Encounters feature flag. If you do not see it in your clinic, contact Serelora at support@serelora.com and ask for it to be turned on.
You can check in appointments that are Booked, Pending or Arrived. For a patient with nothing on today's schedule, see Walk-In Visits.
Step 1: Open Check in
Use whichever place is closest to what you are doing.
- Calendar. Select the appointment, then select Check in in the card that opens.
- Patient chart. In the sidebar's Current visit card, select Check in. This appears when the patient has an appointment today. If there is more than one, a Check in list asks which appointment, and you select one and then Continue.
- Patient List. Open the actions menu on the patient's row and select Check in.
If a patient already has an open visit, there is no Check in button. If a colleague checks the patient in just before you, the dialog is titled Visit already started and tells you there is nothing to check in.
Step 2: Confirm the details
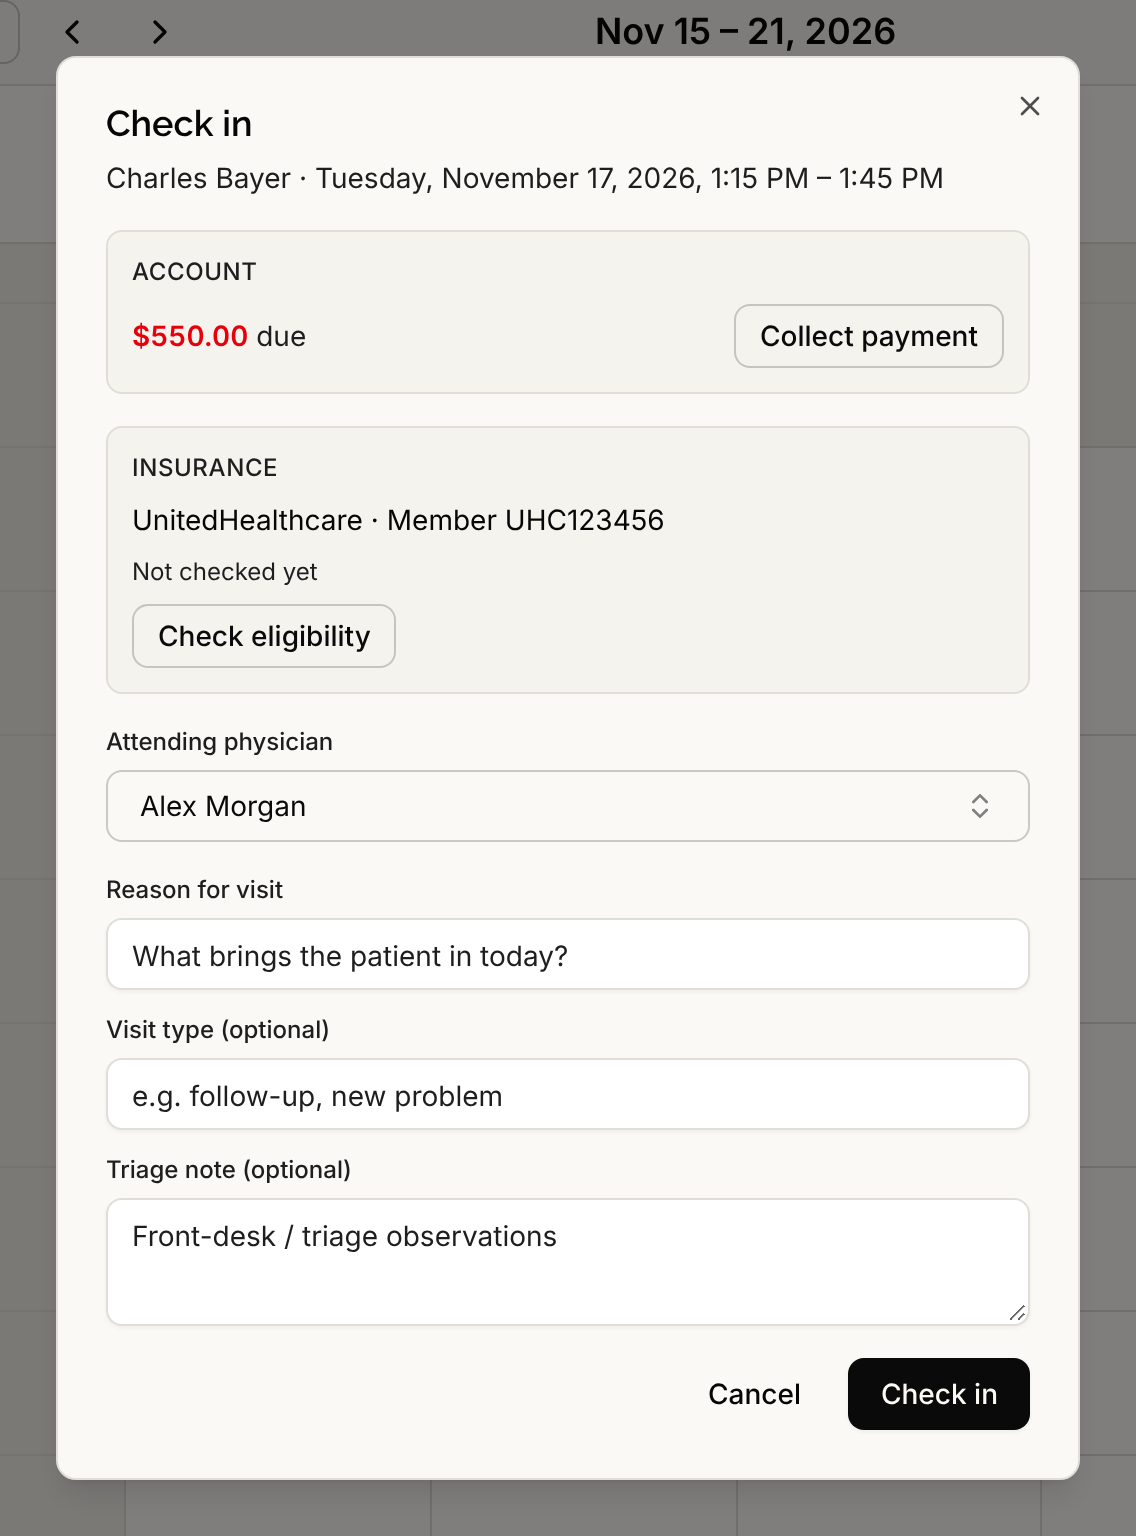
The dialog names the patient and the appointment time. Fill in or check:
- Attending physician. Required. The physician responsible for the visit. You are preselected if you can be an attending; otherwise the appointment's provider is preselected when they can. See Attending Physicians.
- Reason for visit. If the patient completed their pre-visit check-in, it is prefilled with a note: "Prefilled from the patient's check-in. Edit if it doesn't match." You can change or clear it.
- Visit type (optional) and Triage note (optional), for example a follow-up or a front desk observation.
When the attending you pick is not the appointment's provider, a Seeing: line shows the provider the appointment was booked with. That person is recorded as a participant in the visit.
If your clinic has billing turned on, the dialog also shows the patient's balance, and with insurance billing it shows their primary coverage. Neither is needed to check someone in.
Step 3: Select Check in
A message confirms Checked in. The appointment now reads Checked in, and the Current visit card in the chart shows the open visit with a Start visit button. Next, see Starting a Visit.
Good to know
- Everyone in the six standard roles can check patients in.
- You cannot choose Checked in from an appointment's status menu. Check in is the only way, because it creates the visit.
- If someone else changed or cancelled the appointment while you were checking it in, you see a message to reload the schedule and try again.
- Checked in the wrong patient or appointment? See Undoing a Check-In.
See also Consent Alerts for Staff.