Search documentation
Find a documentation page by the words on it.
Documentation
Booking an Appointment
You book an appointment by choosing a time on the Calendar and filling in a short card. A new appointment is always created as Booked. Everything else, such as the visit type and reason, is added afterward.
Step 1: Choose the time
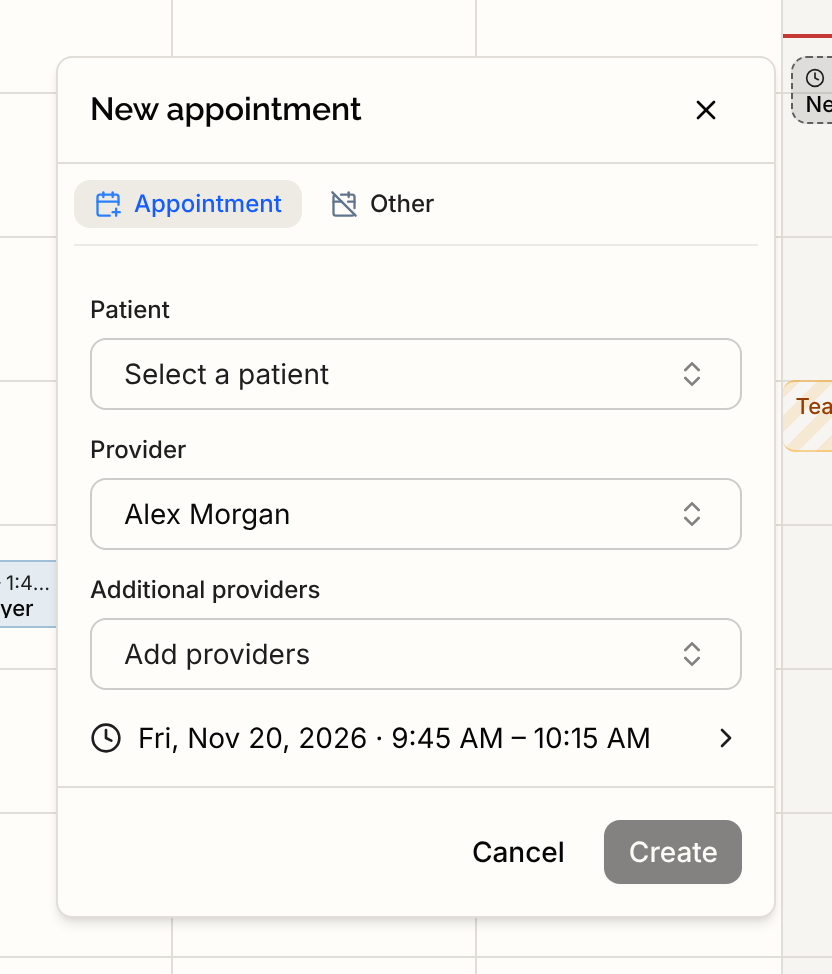
Open the Calendar. Select an open time in a day's column, or press Create at the top to start at the next free half hour. A New appointment card opens, with a 30 minute slot already set.
Step 2: Choose the patient
Leave the Appointment tab selected, then use Patient to search by name or MRN. Each result shows the date of birth and MRN underneath, which helps when two patients share a name.
If the patient is not in the list, select New patient to add them, or select the entry that reads Create "Jane Sample", using the name you typed. The add-patient form opens with the name filled in, and the new patient is selected when you save.
Step 3: Check the provider and time
- Provider is you by default. Change it if the appointment is for someone else.
- Additional providers is optional, for visits seen by more than one clinician. Up to 10 can be added, and the provider you chose cannot be added twice.
- The date and time line shows the slot, for example Fri, Jul 24, 2026, 9:00 AM to 9:30 AM. Select it to change the date, the Start and End times, or to tick Ends next day for a visit that runs past midnight.
Times use your clinic's time zone, and the time pickers move in 15 minute steps.
Step 4: Select Create
A message confirms Appointment created, and the appointment appears on the Calendar as Booked.
If you see an error and you are not sure whether the appointment was saved, check the Calendar before you press Create again. A second press books a second appointment.
Step 5: Add the details
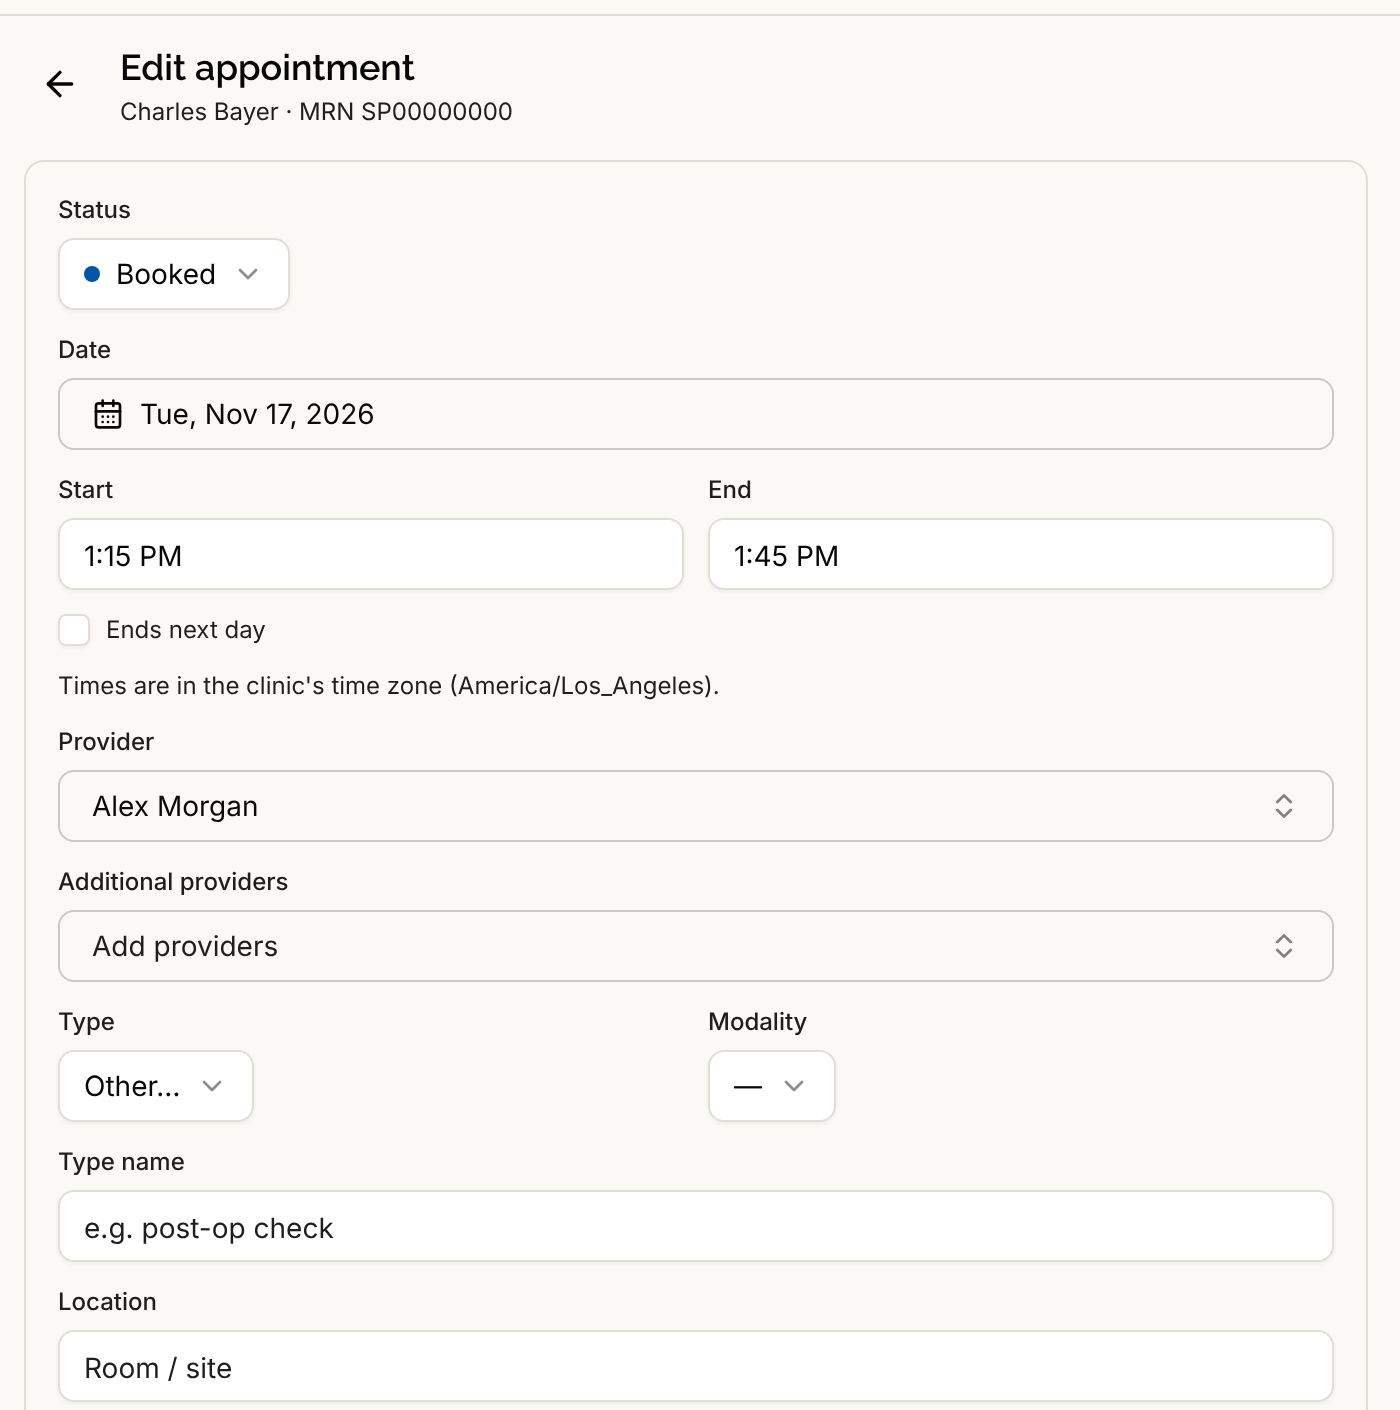
Select the appointment, then select the details line, which reads Add details until something is filled in. The Edit appointment page opens with:
- Type, from your clinic's appointment types, or Other… with a Type name you write yourself. See Appointment Types.
- Modality: In person or Telehealth.
- Location, Reason and Notes, each up to 500 characters.
Select Save changes.
Good to know
- All six standard roles can book appointments.
- The Calendar does not check for double booking. Look at the provider's column before you create the appointment.
- If your clinic has reminders turned on, the patient receives a confirmation. See Appointment Reminders.
- To block time that is not a patient visit, use the Other tab. See Blocking Time on the Calendar.
See also What Patients See About Their Appointments and Telehealth Appointments.